
The landscape of iPhone problems is large and varied, encompassing hardware glitches, software complexities, and even issues resulting from our engagement with the phone as users. These issues can originate from various causes, ranging from hardware and software complications to unexpected faults inside the iOS ecosystem.
This comprehensive guide will delve into the world of common iPhone problems, offering insights into their origins and practical solutions to fix them. Ultimately, you’ll be able to address your iPhone issues while minimizing downtime and frustration effectively.
Let’s get the ball rolling.
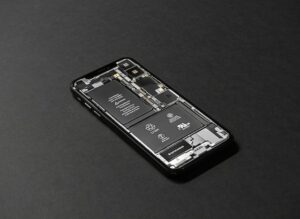
Battery Drainage/Battery Life Problems
Rapid battery depletion is a common issue many iPhone users deal with at one point through their device’s lifecycle.
Typically, the problem of rapid battery drainage can be attributed to one or more of the following:
- Background apps — apps running in the background consume significant battery power, even when unused.
- Push notifications — frequent notifications that wake up the screen, resulting in faster battery drain.
- Screen brightness — high brightness settings contribute to faster battery drain.
- Battery-intensive apps — certain apps, like games and navigation, require substantial processing power and can quickly drain the battery.
Here’s how to fix your iPhone battery drainage problem.
#1. Turn off push notifications
Apps with frequent push notifications can contribute to battery drain.
To get started, go to “Settings” > “Notifications.” Check for apps that have a high number of notifications and consider adjusting their notification settings.
To turn off push notifications on your iPhone, follow these steps:
- Open the “Settings” app.
- Scroll down and tap on “Notifications.”
- Select the app for which you want to turn off push notifications.
- Toggle off the “Allow Notifications” switch.
Repeat these steps for any other apps you want to turn off push notifications.
#2. Do a battery check
To do a battery check on an iPhone and identify apps that may be draining the battery even when the phone is in standby mode, perform the following steps in the sequence listed:
- Usage insights
- Go to “Settings” > “Battery.”
- Wait for a moment to see the “Battery Usage” section. This will show you a breakdown of battery usage by apps in the last 24 hours or the last 10 days.
- Look for apps that have consumed a significant amount of battery even when you haven’t been actively using them.
This could indicate background activity that’s draining the battery. Uninstall these battery-intensive apps and consider alternative apps.
That said, if there are battery-intensive app(s) you can’t do without, stopping them from auto-refreshing in the background will suffice.
- Background app refresh
- In the same “Battery” section, scroll down to “Battery Usage by App.”
- Here you’ll see a list of apps and their battery consumption.
Pay attention to apps with higher background activity. Apps listed here might refresh the background content, leading to battery drain.
To turn off background app refresh,
Go to “Settings” > “General” > “Background App Refresh.”
You’ll see a list of apps with toggles next to them. Toggle off apps you don’t want to refresh content in the background.
#3. Location services
Apps that use your location in the background can consume more battery.
Go to “Settings” > “Privacy” > “Location Services.”
Review the apps and their location access settings. You can choose to limit location access for specific apps.
#4 Software updates
Another way to fix iPhone battery life problems is by keeping your iOS up to date.
Apple often includes optimizations and bug fixes that can improve battery life. Furthermore, newer iOS versions may have improved background app management, leading to better battery efficiency.
iPhone Screen Problems
These include the iPhone’s white screen of death and flickering/frozen screens. The iPhone White Screen of Death can occur due to unsuccessful upgrades, jailbreaking attempts, or hardware issues.
To start the fix, try force restarting the device, which should rectify the problem.
Follow these steps based on the model you have to force restart your iPhone.
- For iPhone 8 and later models:
- Press and quickly release the “Volume Up” button.
- Press and quickly release the “Volume Down” button.
- Press and hold the “Side” button (the Power button) until you see the Apple logo on the screen. Keep holding the button until the logo appears.
- For iPhone 7 and previous models:
- Press and hold both the “Volume Down” button and the “Sleep/Wake” (Side) button at the same time.
- Keep holding both buttons until the Apple logo appears on the screen.
If force restarting your iPhone proves ineffective, consider performing a hard or factory reset on your iPhone.
Suppose the issue persists even after a hard reset. In that case, an alternative step is to boot your iPhone into DFU (Device Firmware Upgrade) mode.
Overheating
iPhone overheating is one of the more common problems iPhone users face. Extreme multitasking and heavy usage are the primary causes of overheating in iPhones. If you notice your iPhone heating up, it’s advisable to relocate it to a cooler environment.
If the device is exposed to intense sunlight, shifting it to a shaded area and allowing a few minutes for gradual cooling is recommended.
Should your iPhone remain excessively warm, take the following steps based on your situation:
- Take off the iPhone case.
- Power off the device temporarily.
- Pause ongoing charging or avoid initiating charging if it’s in progress.
- Steer clear of direct sunlight.
- Avoid leaving your iPhone inside a parked car as temperatures escalate rapidly.
- Halt activities that strain the CPU, such as GPS navigation, graphics-intensive gaming, sharing large videos, or watching movies.
- Suspend Bluetooth usage.
- Activate Airplane mode.
- Verify that you’re using an official Apple cable for charging.
IMPORTANT: Never attempt to cool down an overheated iPhone by placing it in a freezer, refrigerator, or front of an air conditioner. The abrupt change in temperature and moisture exposure in such environments could potentially harm the device’s internal components.
Water Damaged iPhone
Accidentally spilled water on your iPhone or had a mishap involving a swimming pool?

Chances are water-damaged iPhones won’t power on. There’s also the risk of data loss. Mind you, liquid damage isn’t covered under Apple’s one-year warranty.
Begin by gently drying the device using a towel and removing the SIM card. Avoid plugging in or attempting to power it on. Another effective method involves placing the iPhone alongside silica gel sachets for approximately two days to facilitate drying. Regrettably, water or other liquids within the iPhone leads to data loss.
However, there’s no need to panic. You can retrieve lost photos, videos, audio files, contacts, and more by tapping into your iCloud or iTunes backup.
iPhone Application Crashes
When an app crashes, it abruptly closes and returns you to the home screen. This can happen for various reasons.
- The app uses more memory than is available, causing it to crash.
- Older app versions may have compatibility issues with your device’s current software.
- Compatibility Issues — apps may not be optimized for the specific iOS version or device model.
- Glitches in the app’s code can lead to crashes.
Let’s quickly review the simple steps to fix app crashes on your iPhone.
#1 Update your apps
Keeping your apps up-to-date is the best way to ensure optimal performance and fix any underlying bug(s).
To do this,
- Go to the App Store
- Tap on your profile picture
- Scroll down to update apps individually or choose “Update All.”
#2 Clear cache
Cached data refers to temporary files and information stored on your iPhone by apps, websites, and the iOS itself. These files are saved locally to help improve the performance and speed of your iPhone when accessing the same content repeatedly.
A scenario where application cached data has accumulated substantially could lead to app crashes. Clearing the application’s cache data from your iPhone’s memory will fix this issue.
To do this,
- Head to your iPhone settings
- In “Settings,” go to “Safari” or the specific app’s settings
- In the pop-up menu, clear cache and browsing history.
#3 Reinstall the app
If an app continues to crash, consider uninstalling and then reinstalling it.
Press and hold the app icon until the icons start wiggling, then tap the “x” to delete the app. Visit the App Store to download and install it again.
#4 Free up iPhone storage
Running low on-device storage can impact app performance. Delete unused apps, photos, and other files to free up space.
#5 Restart your iPhone
iPhones and most electronic devices are designed so that a simple restart can resolve app crashes caused by temporary software glitches.
To restart your iPhone, hold the power button until “slide to power off” appears, then turn it back on.
#6 Update iOS
Outdated iOS versions can cause compatibility issues with apps.
Go to “Settings > General > Software Update” to check for and install the latest iOS version.
Data Loss and Recovery
You can lose precious data due to software glitches, such as failed updates, corrupted files, or accidental deletions.
To recover lost data on your iPhone, do these;
- If you have a recent backup, you can restore your device to a previous state with minimal data loss. Connect your device to iTunes or iCloud and select the most recent backup.
- Check the “Recently Deleted” folder for photos and videos. Items are retained for a limited time before permanent deletion.
- If you have iCloud Backup enabled, restore your data by going to “Settings > [Your Name] > iCloud > Manage Storage > Backups.”
- Use data recovery software — third-party data recovery tools can help retrieve lost data from your iPhone.
- Apple Support might provide guidance if data loss occurred after an official iOS update or due to a known bug.
- If you regularly back up your iPhone using iTunes, you can restore your data from a previous backup using iTunes.
iTunes Error 3194
Suppose you’re facing iTunes error 3194 during an iPhone restoration or upgrade attempt.
In that case, it’s likely due to factors such as an incorrect firmware version, an unapproved iOS version, or the use of a jailbreak tool for upgrading.
Fortunately, this issue can be resolved by modifying the host files of your system. Alternatively, performing a factory reset is another option to tackle iTunes error 3194.
Apps Not Working on iOS 16
After updating to iOS 16, you might encounter issues with non-functional apps.
Apple has transitioned from 32-bit to 64-bit apps in iOS 16. Consequently, any 32-bit apps will no longer function on your device. To address this:
- Access your device’s settings to identify obsolete applications.
- Tap on any 32-bit app to be directed to the App Store.
There, check for any available updates or newer versions of the app.
Unfortunately, your options are limited if an updated version isn’t available. You can remove the 32-bit applications from your iPhone and explore alternative apps with similar functionality.
Face ID Not Working
The iPhone Face ID feature enables seamless access to your device, App Store, iTunes, and more without needing a passcode. However, post-iOS upgrade, Face ID issues are frequently reported. To address this:
Reboot your iPhone or perform a simple power cycle to restore Face ID functionality.
If the problem persists, consider resetting the Face ID settings within the device’s Settings menu.
iPhone Can’t Connect to WiFi
Following the iOS 16 update, a common issue emerged where users found their iPhones no longer connecting to their personal WiFi networks.
To begin troubleshooting, restart your iPhone and verify the WiFi connection.
Confirm that your router is functioning correctly, updated with the latest firmware, and compatible with Apple devices. If the problem persists, consider resolving it by following these steps:
- Attempt to reconnect to WiFi after performing a ‘Reset Network Settings’ from your iPhone’s Settings menu.
Should these solutions prove ineffective and the issue remains unresolved, you have a couple of options:
- Update to a more recent version of iOS.
- Restore your iPhone to a previous software version that was working effectively.
Forgot passcode/iPhone disabled
Indeed, it’s possible to forget your iPhone passcode, resulting in multiple unsuccessful attempts to unlock the device. This can make your iPhone disabled temporarily, prompting retry intervals of 5, 15, 20 minutes, and so forth.
To regain access to your disabled iPhone, the following steps are recommended:
- Perform a device reset and establish a new passcode.
- Eliminate the old passcode by restoring your iPhone through iTunes or iCloud.
- Alternatively, utilize Recovery Mode as a solution for a disabled iPhone.
Keep in mind that resolving a disabled iPhone involves a complete loss of data, encompassing passwords, photos, videos, music, Safari bookmarks, contacts, apps, camera roll, chats, and more.
Therefore, we recommend recovering all data from an iCloud backup or using iPhone recovery software before embarking on the troubleshooting process.
Conclusion: iPhone Problems and Solutions in Winnipeg
In the unlikely event that you encounter unexpected errors before upgrading your iPhone, it’s always a good idea to be prepared and knowledgeable about troubleshooting solutions. By implementing self-help solutions, you can avoid much dreaded downtime and ensure your iPhone is up and running without delay. However, if you find yourself facing complex issues or are uncertain about any step, it’s strongly recommended to seek assistance from an authorized repair service.