
Dealing with a broken processor is a major problem for all computers. It can cause the computer to slow down, crash, or even not start at all. If you think your processor is broken, there are a few things you can do to try to fix it.
In this guide, we will show you how to fix a broken processor. We will also discuss the symptoms of a broken processor and how to diagnose the problem. By following the steps outlined, you will gain the knowledge to address the issue and restore your computer’s performance.
What is a Processor
A processor, also known as a central processing unit (CPU), is a crucial component that carries out all the processing that makes a computer work. It serves as the “brain” of the computer responsible for performing calculations and executing instructions.
The processor is composed of millions of transistors arranged in a complex circuit. These transistors work together to carry out the necessary computations and instructions. Transistors play a fundamental role in the functioning of a processor, performing essential tasks such as arithmetic and logical operations, and controlling the data flow within the processor.
The processor is connected to the other parts of the computer using a system bus. The system bus consists of wires that transfer data between the processor, memory, graphics card, and hard drive. The processor’s speed is measured in gigahertz (GHz), which tells us how fast it can perform calculations.
A higher GHz rating means the processor can do more calculations in a second. The processor plays a crucial role in evaluating a computer’s performance and determining its suitability for specific tasks.
Importance of a Processor
The processor carries out a series of essential functions to effectively execute instructions and perform computations. These functions, often referred to as the “instruction cycle” or “fetch-decode-execute cycle,” can be categorized into four primary stages:
The Fetch Function
The fetch function is the process of the CPU receiving instructions from RAM (Random Access Memory). The instructions received during the fetch function are represented in binary form, which is the fundamental language computers use for communication.
Each instruction acts as a building block within a larger operation, and the CPU needs to anticipate the subsequent instruction. To achieve this, it relies on a program counter that keeps track of the RAM addresses where the instructions reside.
Upon fetching an instruction, the CPU stores it in a dedicated register called the Instruction Register. Simultaneously, the program counter is incremented by 1 to indicate the address of the next instruction in line.
The diagram below illustrates the Fetch Function:
CPU
    Program Counter
    Instruction Register

RAM
    Instruction 1
    Instruction 2
    Instruction 3
The Decode Function
The decode function is a vital process within the CPU that involves comprehending the meaning of an instruction. To achieve this, the CPU employs an instruction decoder, which translates the instruction into a set of signals. These signals are then dispatched to various components within the CPU for further action.
The instruction decoder, a specialized circuit, is designed to interpret the different types of instructions that the CPU can execute. When the CPU receives an instruction, it sends it to the instruction decoder. Upon fetching an instruction, the CPU transfers it to the instruction decoder. The decoder then interprets the instruction, generating signals that communicate its meaning. The generated signals are then directed to the relevant components within the CPU for processing.
The Execute Function
The execute function within the CPU is responsible for carrying out instructions. Using the signals generated by the instruction decoder, the CPU controls different components to perform the required operations.
Once executed, the result can be utilized by other instructions, stored in RAM or the hard drive, or transmitted to output devices like display monitors or speakers. The execute function is integral to the CPU’s functioning, enabling the execution of instructions and generating results for further processing or output.
The diagram below illustrates the Execute Function:
CPU
    Instruction Decoder
    ALU
    Registers
    RAM
    Output Device
The Store Function
The write back or store stage is the final stage of the instruction cycle. In this stage, the processor stores the results of the executed instruction. The results are stored in the appropriate registers or memory locations.
The registers are small, fast memory locations that are used to store the results of instructions. The memory locations are larger and slower than the registers, but they can store more data. The results of the instruction are stored in the appropriate registers or memory locations so that they can be used by other instructions. The results can also be accessed by the user or by other programs. The store stage is vital in the instruction cycle because it ensures proper storage of instruction results for future use.
The diagram below illustrates the write back or store stage:
CPU
    Instruction Decoder
    ALU
    Registers
    RAM
    Output Device
The four functions of the CPU—fetch, decode, execute, and write back—are executed in a continuous cycle. This cycle repeats for each instruction, allowing the CPU to process instructions one after another and perform the necessary computations required to carry out various tasks. Understanding the functions of a processor, let us now explore the potential symptoms indicative of a malfunctioning processor.
Related: How to Repair Laptop Battery
What are the Symptoms of a Broken Processor?
Many symptoms can indicate a broken processor. Some of the most common symptoms include:
Blue screen errors
If you’re seeing blue screens on your computer frequently, it could mean that something is wrong. Among these potential issues is a failing CPU. If you are experiencing frequent blue screens, it is essential to investigate and determine if the CPU is the source of the problem.
Slow performance
If your computer programs are running very slowly or not opening at all, it could be due to a problem with your CPU. The CPU is responsible for running programs, so if it’s malfunctioning, it can result in decreased performance and program failures.
Overheating
If your computer is getting too hot, it may indicate a problem with the CPU. The CPU is the component that handles all the tasks in your computer, and if it’s not functioning correctly, it can lead to overheating issues.
System instability
If your computer frequently crashes or freezes, it could be due to your CPU struggling to handle the workload. When the CPU cannot cope with the demands placed upon it, it becomes unstable, which can result in crashes and freezes.
Inability to boot or start
If your computer experiences significant delays in booting, it could be a sign of a failing CPU. A slow startup indicates that the CPU is struggling to process information efficiently, leading to delays in the booting process.
Unusual fan behavior
If your computer’s fans are spinning faster than usual, it may indicate that your CPU is having problems. A failing CPU can put an unnecessary load on the system, causing an increased fan activity as they work harder to maintain proper cooling.
Strange noises
If your computer is producing unusual sounds, it could indicate a problem with the CPU. The CPU regulates the fans, so if it’s not operating correctly, you might hear peculiar noises.
Low system performance
A noticeably slower computer could be a sign of a failing CPU. When the CPU isn’t functioning properly, it directly impacts the performance of your computer, leading to decreased speed and efficiency.
If you’re encountering any of the mentioned issues, it might be necessary to consider replacing your CPU. There are many different CPUs on the market, so you can find one that fits your needs and budget. If you’re unsure about replacing the CPU on your own, it’s advisable to seek assistance from a professional repair technician.
How to Diagnose a Broken Processor?
Here are some steps you can take to diagnose a broken processor:
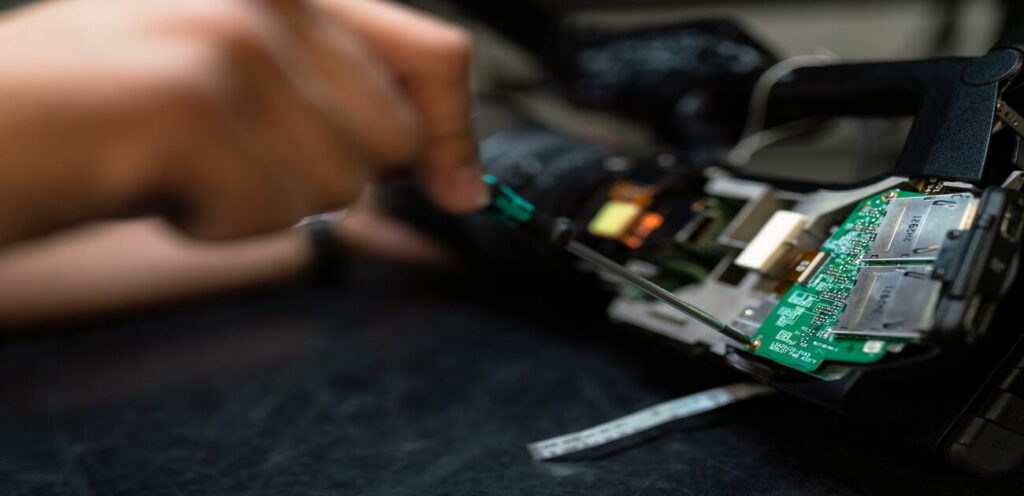
Check for physical damage
To check for physical damage, inspect the processor for any visible signs such as bent pins, cracks, or burn marks. If you notice any of these physical damages, it is likely that the processor is broken and needs to be replaced. Physical damage can occur due to mishandling, improper installation, or external factors. In such cases, replacing the damaged processor is the recommended course of action to restore proper functionality to your computer.
Here are some comprehensive steps on how to check the physical damage:
- Identify the processor: The processor is a small, rectangular chip located on the motherboard, covered by a heat sink and fan.
- Remove the heat sink and fan: To inspect the processor, open the computer case and remove the heat sink and fan.
- Inspect the processor: Examine the processor for any signs of physical damage, such as bent pins, cracks, or other noticeable issues.
- Replace the processor if needed: If you discover any physical damage, it is necessary to replace the processor.
Check the temperature
To analyze the temperature of your processor, use a temperature sensor to monitor its heat levels. If the temperature is excessively high, it may indicate that the processor is overheating. It is crucial to address any overheating issues promptly to prevent further harm to the processor. Monitoring the temperature and ensuring proper cooling measures will maintain the optimal operating conditions of the processor.
Here are some comprehensive steps on how to check the temperature of a processor:
- Identify the temperature sensor: Your computer’s motherboard features a temperature sensor for monitoring the processor’s temperature. The exact location of the sensor may vary depending on the motherboard model.
- Download and install a temperature monitoring tool: Install a temperature monitoring tool like HWMonitor or SpeedFan from a trusted source.
- Open the temperature monitoring tool: Launch the installed temperature monitoring tool to access its features and functionality.
- Monitor the processor temperature: Keep a close watch on the temperature reading provided by the monitoring tool. Ensure that it stays within the safe operating range for your processor.
- Take corrective measures: If the processor temperature exceeds the safe range, implement necessary measures to address the issue. This may involve improving the cooling system, such as cleaning the fans, adding additional cooling components, or reducing the processor’s workload.
Diagnostic tools
Run a diagnostic tool to check for issues with the processor. This will help you identify and address any potential problems affecting its performance.
Here are some comprehensive steps on how to use the diagnostic tools:
- Identify the diagnostic tool: There are various diagnostic tools available, such as MemTest86+, Hard Disk Sentinel, and CPU-Z, which serve different purposes in diagnosing computer issues.
- Download and install the diagnostic tool: Select the diagnostic tool that suits your needs, and download it from a reliable source. Install the tool on your computer following the provided instructions.
- Configure boot order and boot from the diagnostic tool: Access your computer’s BIOS or UEFI settings to change the boot order, prioritizing the diagnostic tool. This allows your computer to boot directly into the diagnostic environment.
- Run the diagnostic tool: Once your computer boots from the diagnostic tool, initiate the tool’s tests and diagnostics. These tests will assess various hardware components and provide test results on the screen.
- Interpret the test results: Review the test results, looking for any errors, warnings, or abnormalities. Each diagnostic tool may present results differently, but the focus is on identifying potential hardware issues.
Try a different processor
Test with a new processor to check the functionality of the original processor. If it functions properly, the original processor is likely defective and requires replacement.
Here are some steps you can take to diagnose a broken processor:
- Identify the compatible processor: Not all processors are compatible with every motherboard. Before trying a different processor, ensure its compatibility by referring to the motherboard’s specifications or utilizing a compatibility checker tool.
- Obtain a compatible processor: If you don’t have a compatible processor, acquire one from a reputable computer store or online retailer.
- Install the compatible processor: Once you have the suitable processor, follow the provided instructions to install it correctly. This might involve opening the computer case and taking necessary precautions.
- Boot your computer: After installing the compatible processor, boot your computer. If it starts up and functions properly, it suggests that the original processor may have been defective and requires replacement.
Tools and Materials Needed to Fix a Broken Processor
If you are faced with a broken computer processor that requires replacement, here are some tools and materials to fix it:
- Torx screwdriver: Use a torx screwdriver to remove the screws securing the processor.
- Isopropyl alcohol: Apply isopropyl alcohol to clean the processor and motherboard.
- Compressed air: Blow away dust and debris from the processor and motherboard using compressed air.
- New processor: If your processor is damaged, acquire a replacement.
- Thermal paste: Apply thermal paste to improve heat transfer from the processor to the heat sink.
- Heat sink: Install a heat sink to remove heat from the processor.
- Safety glasses: Wear safety glasses for eye protection against dust and debris.
- Anti-static wrist strap: Use an anti-static wrist strap to prevent static electricity damage to the processor.
Step-by-Step Instructions on How to Fix a Broken Processor
Fixing a broken processor requires careful steps to diagnose and resolve the issue. Follow this guide to address problems with your processor and potentially restore its functionality:
- Prepare your tools and materials: Ensure that you have all the necessary tools and materials, such as a torx screwdriver, isopropyl alcohol, compressed air, a new processor, thermal paste, a heat sink, safety glasses, and an anti-static wrist strap.
- Turn off and unplug your computer: Before starting any work, power down your computer and disconnect it from the power source to avoid static electricity damage.
- Open the computer case: Use a screwdriver to remove the case screws and open the computer case.
- Locate the processor: Find the processor, a small rectangular chip typically covered by a heat sink and fan, on the motherboard.
- Remove the heat sink and fan: Use a screwdriver to loosen and remove the screws securing the heat sink and fan. Carefully detach them from the processor.
- Inspect the processor: Check for any physical damage on the processor. If you notice any damage, you will need to replace the processor.
- Install the new processor: Align the new processor correctly with the socket on the motherboard and secure it in place with screws.
- Apply thermal paste: Apply a thin layer of thermal paste on top of the processor to aid heat transfer to the heat sink.
- Install the heat sink and fan: Carefully position the heat sink and fan over the processor and secure them with screws.
- Close the computer case: Once the heat sink and fan are properly installed, close the computer case and secure it with screws.
- Power on the computer: Plug in your computer and power it on. Test to ensure that it is functioning correctly after the repairs.
Frequently Asked Questions on How to Fix a Broken Processor
Processors are important because they perform computations and execute instructions on computers.
To fix a processor problem, diagnose the issue and consider replacing the processor if necessary.
A broken processor can cause slow performance, crashes, overheating, and computer startup issues.
Generally, a broken processor cannot be fixed and should be replaced.
Steps to replace a CPU: Turn off and unplug the computer, open the case, locate and remove the old processor, install the new processor, apply thermal paste, attach the heat sink and fan, close the case, and power on the computer to test.
Conclusion: How to Fix a Broken Processor
A broken processor can cause slow performance, overheating, system instability, and inability to boot. If you are experiencing any of these issues, it is important to check your CPU for signs of damage. If you find any damage, you need to replace the CPU. Replacing a CPU can be a difficult task, so it is advisable to seek assistance from a professional repair technician.