Apple products are famous for sharing via airplay and airdrop. The airdrop is the most famous way of sharing files and data between iPhones and other Apple devices. This is a very fast approach, which is connected with both Wi-Fi and Bluetooth switched on for the devices in question. Another good feature of the airdrop is the ability to transfer files to multiple devices within 30 feet radius.
Related: Is iPad 10.2, still worth it in 2023?
This will enable transfer to Mac, iPhone, and iPad pairs within such range. However, this is limited to Apple devices, and not everyone makes all their devices Apple products. Even among people not using the iPhone, the iPad is common, which is due to its versatile use, and of course, the kids. Also, most tech people use the iPad while their laptop is not Mac but Windows enabled Personal computer (PC). Situations might arise, where you need to transfer pictures, files, or important documents from your iPad to your PC, and this is why you should know how to do this in simple methods and steps.
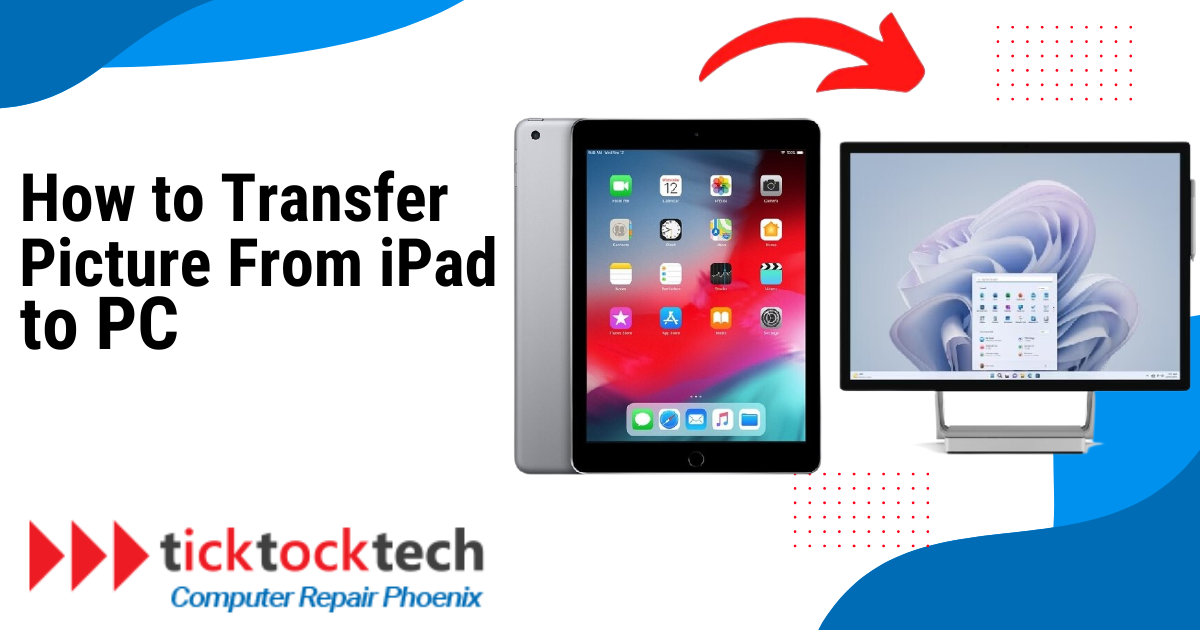
Methods of Transferring Files and Pictures from iPad to PC
Different ways you can get your file transfer done from iPad to PC include using a USB connection, Flash drives, iTunes, Third-party apps, and iCloud. These processes are straightforward, which makes it easier to send the files in bulk quantity.
See Also: iOS17 Accessibility Features, what you should know.
How to Transfer Pictures and files from iPad to PC using USB Connections
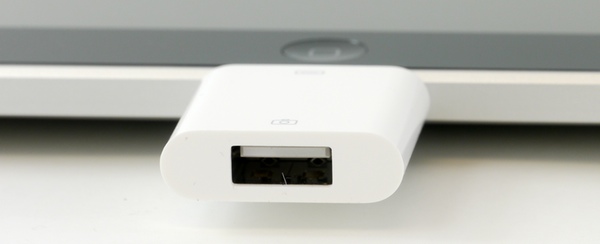
1. Connect your iPad to the PC using the proper connector (often a Lightning to USB adapter).
2. You could notice a popup on your iPad asking you to “Trust This Computer.” To connect, use the “Trust” button.
3. Launch the “Finder” (Mac) or “File Explorer” (Windows) program on your computer. You will be able to browse the files on your devices using this.
4. Your iPad should be shown in File Explorer (Windows) under “This PC” or “Devices and Drives.”
5. To access your iPad’s internal storage, double-click on its icon in File Explorer (Windows) or Finder (Mac).
6. Find and access the “DCIM” folder in the internal storage of the iPad. Your pictures and videos are typically kept in this location.
7. Your images are organized in subfolders under the “DCIM” folder. By clicking on the photographs you wish to transmit while depressing the “Ctrl” key, you may choose them.
8. To copy and paste the selected photographs on a disk or within another folder on the computer, right-click on them and pick “Copy” from the context menu (Windows).
How to Transfer Pictures and files from iPad to PC using iTunes

1. Get the newest version of iTunes from the official Apple website and install it on your Windows PC.
2. Attach your iPad to the Windows PC with a suitable USB cord. Ensure that the “Trust the Device” button is selected while the iPad is unlocked and on the home screen.
3. As soon as your PC and iTunes are connected, iTunes should launch immediately. Manually open iTunes if it doesn’t.
4. The iPad icon may be found in the upper left corner of iTunes or the “Devices” section. To pick your iPad, simply click on it.
5. Click “Settings,” then select the “File Sharing” option.
6. Choose the app from which you wish to transfer files from the list of applications on the right. For instance, select the Photos app if you wish to transfer photos.
7. When the app is selected, the files related to it should appear on the right side of the screen. Choose the files you wish to send to your Windows computer.
8. On your Windows PC, drag and drop the chosen files from the iTunes window onto the desktop or the folder of your choice. When finished, carefully eject the USB.
How to Transfer Pictures and files from iPad to PC using Third Party Transfer Apps

Apps like Xender and ShareIT allow you to transfer your pictures and files from iPad to PC, and you can achieve this by following a step-by-step process.
1. Download the File Transfer App first.
Look for a dependable file transfer program in the program Store on your iPad. “Xendar” or “Shareit” by SHAREit Technologies Co. Ltd. is one well-known instance. To download and install the app on your iPad, tap “Get”. After installing the app, touch its icon on the home screen of your iPad to launch it.
2. Connect Devices
Ensure that your Windows PC and iPad are both logged into the same Wi-Fi network. You may often select “Connect to PC” or “Send/Receive” files from the file transfer software. To start the connection, tap on that choice. You will be given the option to select whether you wish to transmit or receive files in the app.
3. Choose the Files to Send option.
Select the images, movies, documents, or other things you wish to transfer to your Windows PC by browsing through the contents on your iPad. To choose a file, tap on it. After choosing your files, click the “Send” or “Transfer” button to begin the file transfer. The program will look for devices using the same Wi-Fi network that are close by.
4. Accept the file, then finish the transfer.
On your Windows computer, you might receive a request to approve the incoming file transfer. The transfer request should be approved. Now the files will be moved from your iPad to your Windows computer. The size of the files and the speed of your Wi-Fi connection will determine how long it takes for the transfer to complete.
5. Unplug the Devices
After the transfer is complete, you can verify your successful movement of all the selected files by checking them on your Windows computer. Take the devices from the file transfer app after the transmission is complete. You can break the connection using certain apps’ “Disconnect” or “End Transfer” options.
How to Transfer Pictures and files from iPad to PC using iCloud

Use iCloud to move files and photos from your iPad to your Windows PC, keep both your iPad and PC connected to the internet for seamless syncing and follow these steps:
1. Switch on “iCloud” on your iPad by heading to “Settings,” pressing on your name, choosing “iCloud,” and enabling “iCloud Drive” and “Photos” for file and image synchronization.
2. Download the iCloud for Windows program from Apple’s website, then finish the setup on your computer.
3. Use your Apple ID and password to log in to iCloud on your computer.
4. Select “Photos” for photographs or “iCloud Drive” for other files and documents in the iCloud for Windows app to sync.
5. Select the directories from which you wish to download images by clicking “Options” next to “Photos” and personalizing the photo sync settings.
6. Press “Apply” to begin the synchronizing procedure.
7. Open the “iCloud Photos” or “iCloud Drive” folder on your PC to access the files and pictures you transferred.
See Also: The Best iPad to Buy in 2023
FAQs
You can transfer pictures and files from your iPad to your PC using various methods, including iCloud, iTunes, AirDrop, and third-party apps. Each method offers different options for transferring and organizing your content.
Some popular third-party apps for transferring files between iPad and PC include Google Drive, Dropbox, OneDrive, and SHAREit. These apps allow you to upload files from your iPad and download them on your PC, making file transfer convenient and straightforward.
Yes, you can transfer files from your iPad to a PC running on either Windows or macOS. Different methods, like iCloud, AirDrop, or third-party apps, work across both platforms, allowing seamless file transfer between devices.
Conclusion
You can achieve transferring pictures and files from an iPad to a PC through various methods, each offering its advantages. Apple users can utilize the convenience of Airdrop for seamless file sharing between Apple devices. However, for those using a Windows PC, alternative approaches like using a USB connection, iTunes, third-party transfer apps, or iCloud can effectively accomplish the task. Whether it’s transferring photos, videos, documents, or other files, these simple methods enable users to effortlessly move their data and keep their devices in sync. By following the step-by-step instructions provided, users can efficiently transfer their valuable data and enhance the seamless integration between their iPad and PC.