VPN has many uses, and protections it offers to the device, and your security as a whole. When you use your iPhone to visit different types of websites, and, you are exposed to trackers. Not only can this reveal some details about your device, but also you. You do not need to hide your location when browsing most websites. However, if you feel unsafe with some websites, you could divert their tracking. Aside, there are situations when content or shows are not available in your country. Using iPhone VPNs to change your geolocation could help access such content. VPN is a life safer on many occasions, especially when it comes to tracking and cybersecurity.
While there are many VPN apps on iPhones, most of them are not entirely free. However, if you are not targeting a specific location, you can simply use the free VPNs on your iPhone. How do you enable VPN on your iPhone for free? Simply download a free VPN on the app store, switch on your mobile data or wifi, choose a location available, and connect. Let’s Elaborate more on this.
#1 Download a Free VPN on the App Store
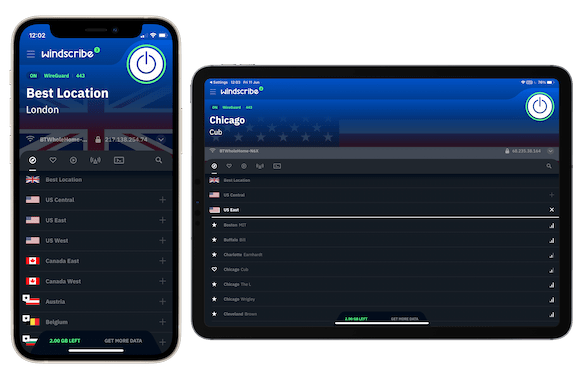
Before you can begin using a virtual private network (VPN) on your iPhone, you will need to download free VPN software from the software Store. There is a wide variety of choices accessible; nonetheless, it is essential to select a solution that delivers robust encryption capabilities and has a good reputation. VPN services such as TunnelBear VPN, Windscribe VPN, and ProtonVPN are among the most well-known free VPN solutions.
When installing a virtual private network (VPN) program, it is important to pay attention to the permissions that the app requires. A decent virtual private network (VPN) program should only ask for permission to access the permissions that are required for it to function effectively, such as the Wi-Fi and Mobile Data connectivity on your iPhone. Watch out for applications that ask for an excessive amount of permissions or access to your personal information.
#2 Switch On Your Mobile Data or Wi-Fi
Make sure that you are connected to a reliable internet source, whether it be mobile data or Wi-Fi, before beginning the process of setting up a virtual private network (VPN) once you have downloaded a free VPN program. By doing so, your iPhone will be able to establish a connection with the VPN server and encrypt all of your internet activities. Be careful to choose a network that is both reliable and quick to have a VPN experience that is uninterrupted.
#3 Switch On the VPN Option in iPhone Settings
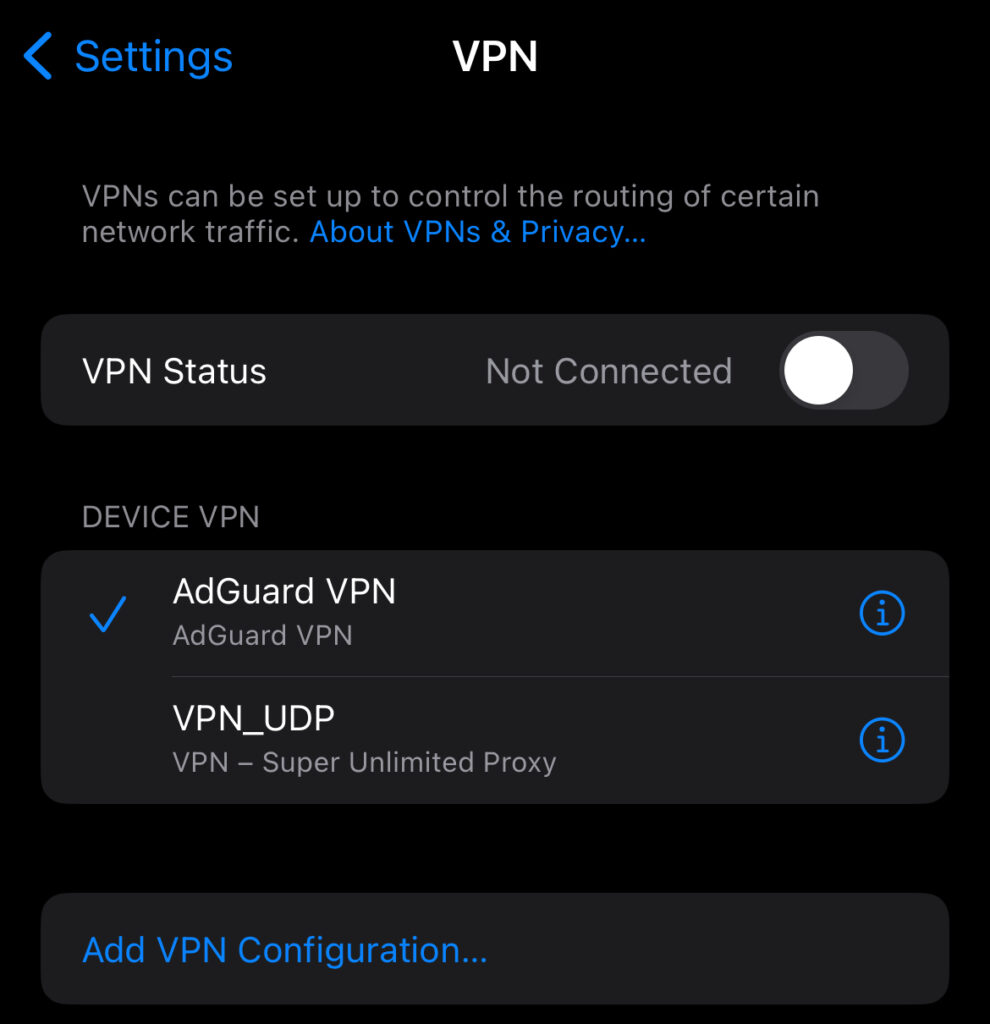
Look for the Virtual Private Network (VPN) option in the Settings menu on your iPhone. Click on the Settings app on your iPhone, and then scroll down until you reach the “General” section. Find the “VPN” option and turn it on by toggling the switch.

This will activate the VPN framework on your iPhone, as well as allow you to connect to the VPN server and enable you to use a virtual private network (VPN) on your iPhone.
#4 Select Available Location on the VPN App
Launch the VPN application that you downloaded after your virtual private network (VPN) has been activated. There is a good chance that you will come across an intuitive user interface that will inform you to select a server location. Depending on the VPN server that you use, the places that are available to you will change.

There are VPN servers that may offer many locations, while some may only offer a single location. Choose a virtual private network (VPN) that meets your requirements, whether it is to circumvent geographical limits or to maintain your privacy. Free VPNs often provide a restricted number of server alternatives. Click “Connect” after you have chosen the area that is most suitable for your requirements.
#5 Connect to the Location
Following the selection of a particular location, the Virtual Private Network (VPN) application will initiate a secure connection with the VPN server. This may take a few seconds, depending on the load on the server and the speed of your internet transmission. Immediately after the connection has been established, the internet activity that occurs on your iPhone will be encrypted, and your IP address will be concealed.
If your VPN connected but did not work: Why does my VPN say connected but not working?
How do I enable VPN on My iPhone for Free?
You can simply download a free VPN on the app store, switch on your mobile data or wifi, enable the VPN on iPhone settings, then choose a location available, and connect. Explanatory, enable a VPN on your iPhone for free, follow these simple steps. First, download a trusted free VPN app from the App Store. Ensure you’re connected to stable mobile data or Wi-Fi. In iPhone Settings, turn on the VPN option. Launch the VPN app, choose a server location, and hit connect. Your iPhone is now safeguarded with encrypted data, providing online privacy without any cost. Enjoy secure browsing and protect your digital footprint effortlessly.
What is the Use of VPNs in 2024?
Virtual private networks, or VPNs, are essential for preserving digital security even when used for privacy-related purposes alone. They provide a barrier against any cyberthreats by masking your IP address. VPNs are a necessary tool for anybody searching for unfettered access to information on the internet worldwide since they provide secure access to geo-restricted material. VPNs protect privacy in a world when online hazards are only becoming worse, providing secure and encrypted online experiences.
Will VPN Hide all my Details?
VPNs conceal IP addresses and encrypt internet connections, which greatly enhances online privacy, but it’s important to be aware of their restrictions. A trustworthy VPN service will protect your online activity from prying eyes and hackers, enhancing your online security. Though VPNs won’t conceal personal information supplied freely, such on social media sites, it’s still important to exercise caution when using them. VPNs are basically good privacy protectors, but a whole digital security plan still has to include safe and considerate online behavior.
Take Away
Beyond hiding your IP address, virtual private networks (VPNs) in 2024 protect you from cyber dangers, provide secure online experiences, and unlock content from around the world. There may be a lot of VPN programs out there, but it’s wise to choose a free and trustworthy one.
The procedure of turning on a virtual private network (VPN) on an iPhone is simple and free. Make sure you have a solid internet connection, activate the VPN in the iPhone settings, pick a server location, and connect. Then, download a trustworthy free VPN program. By doing this easy practice, you may strengthen your digital privacy and protect yourself from prying eyes without spending a penny. When it comes to protecting your digital well-being in the ever-changing world of cybersecurity, VPNs are still essential.
More Helpful iPhone Tips: 7 Signs That Show Your iPhone Battery is Going Bad

