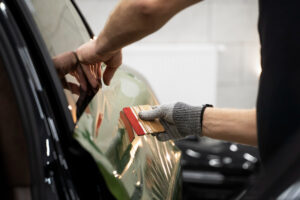
Car owners remove window tints for a variety of reasons. Some may want to restore their vehicle’s original appearance, while others may be looking to apply a new tint. Whatever the reason, removing window tint can be a challenging task that may require the help of a professional. However, it is entirely possible to remove window tint at home using the right tools and techniques. In this guide, we will walk you through the steps of safely and effectively removing window tint, so you can restore your vehicle’s appearance or prepare it for a fresh tint application.
Tools Required to Remove Window Tint from Cars

Before removing your window tint, you need certain tools for a safe and easy process. These tools include:
- Heat Gun or Hair Dryer for softening the adhesive that binds the tint to the window. The heat helps to loosen the tint, making it easier to peel off.
- Razor Blade or Utility Knife to lift the edges of the tint and peel it off the glass. Be careful not to scratch the glass while using the blade.
- Ammonia-Based Cleaning Solution to remove any adhesive residue left on the glass after peeling off the tint.
- Lint-Free Cloth or Paper Towels to apply the cleaning solution and wipe away any residue or debris.
- Plastic Sheeting or Garbage Bags to prevent a mess inside your car. Cover the interior with plastic sheeting or garbage bags to catch the pieces of tint as you remove them.
- Sponge or Sprayer Bottle to apply the cleaning solution to the window.
- Protective Gear to protect your hands from adhesive and cleaning chemicals. Also, Eye protection to shield your eyes from any debris that may dislodge during the process.
- Steaming Machine for loosening the tint and adhesive, making the removal process quicker and more efficient.
Related: Car repair and maintenance services
Tips to Consider When Removing Window Tint from Your Car

Here are some tips to help you remove window tint from your car and achieve the best results:
- Start with the easiest windows. If you are new to removing window tint, start with the easiest windows, such as the rear windows. These windows are usually smaller and have less adhesive residue.
- Protect yourself. Wear gloves and eye protection to protect yourself from potential hazards.
- Apply heat carefully. Whether you’re using a heat gun or a hair dryer, apply heat outside the window and avoid direct contact with the defroster lines or antennas on the rear window.
- Be patient. Removing window tint can be a slow and tedious process. Be patient and take your time to avoid damaging the window.
- Clean the windows thoroughly. After removing the tint, clean the windows with an ammonia-based cleaning solution or a specialized window tint adhesive remover. Use a lint-free cloth or paper towels to wipe away any adhesive residue and ensure a clear surface.
- Avoid harsh chemicals. Refrain from using abrasive materials or harsh chemicals on the glass, as they may scratch or damage the surface.
- Dispose of the old tint properly. The old tint and adhesive can be hazardous waste. Ensure you dispose of them safely and responsibly.
Related: How do I find my parked car on my iPhone?
5 Easy Methods to Remove Window Tint from Your Car
1. Soap and Scrape
This method of window tint removal is a convenient option, particularly for smaller areas, and can be easily accomplished with common household tools. However, it can be tedious and time-consuming.
Step-by-step guide:
- Begin by using your fingernails or a sharp knife to lift a corner of the window tint. Gently scrape along the edges as you slowly peel the tint down.
- Gradually separate a sufficient portion of the film from the glass, then firmly grasp it and continue pulling it down. Don’t worry if it breaks or tears; repeat the process until you can peel it off in a single piece. Repeat until all the tint is removed.
- Create a soapy mixture by combining mild detergent or dish soap with water. Fill a spray bottle with this mixture and generously spray it over the glass. This will aid in removing any window tint glue residue left after peeling off the tint film.
- Use a razor or knife to scrape off the remaining glue. For a better grip and safety, consider using a piece of cloth to handle the razor. Alternatively, you can try a small amount of nail polish remover.
- Keep the glass moist with the soapy mix to prevent scratching.
- Finally, clean the windows with glass cleaner and wipe them dry with paper towels.
2. Ammonia, Trash Bags, and Sunlight
This method requires ammonia and sunlight to remove window tint glue from your windows. It is important to exercise caution when handling ammonia and ensure proper ventilation by wearing a mask.
Step-by-step guide:
- Park your car outside on a sunny day, ensuring direct sunlight on the windows you’ll be working on.
- Cut the black trash bags to fit the shape of your windows. Moisten the windows with soapy water and cover them with trash bags.
- Use a razor to trim excess plastic and eliminate air pockets between the bag and the glass. The trapped heat between the plastic and the window will facilitate film removal.
- Protect the interior surfaces with a cloth or tarp, then wear a mask and spray undiluted ammonia on the inner side of the glass.
- Ensure the inner window is thoroughly wet with ammonia before covering it with another plastic bag. Leave the door open to allow the ammonia and heat to soften the glue.
- Wait for about an hour, then remove the trash bags and peel off the film. Use the razor to lift one corner without damaging defroster lines and try to remove the film in one piece. Keep the glass moist with ammonia to prevent the glue from hardening.
- Use super-fine steel wool and ammonia to remove any remaining adhesive. Dry the window with paper towels.
- Complete the process by using glass cleaner to give the windows a polished shine.
3. Hair Dryer
This method uses heat to soften the adhesive of the window tint, making it easier to peel off. It is a simple and effective way to remove window tint, but it can be messy.
Step-by-step guide:
- Set your hair dryer to the hot setting and direct it to the inner side of the window. Begin by loosening the upper corner of the tint, holding the hair dryer about 2 inches away from the glass. Heat the tint for approximately 30 seconds before attempting to peel it off using a razor blade.
- If the tint becomes pliable enough, try to peel it off in one piece. If not, continue heating it with the hair dryer and remove it in sections.
- Apply adhesive remover to the entire window using a spray bottle. Allow it to sit for 10 minutes before proceeding.
- Carefully use the razor blade to scrape off any remaining glue residue or tint from the glass. Clean the glass with Windex or a similar cleaner, then dry it off with a towel.
4. Heat Gun
This method uses heat to soften the adhesive of the window tint, making it easier to peel off. It is a quick and effective way to remove window tint, but it can be messy.
Step-by-step guide:
- Position the heat gun on the outer side of the window, maintaining a distance of 4-6 inches from the glass. Avoid using the heat gun from the inside, as it may cause the tint to melt and adhere to the glass.
- Warm the glass with the heat gun and begin peeling off a corner of the tint from the inside. Take your time and aim to remove the entire tint in one piece if possible. Alternate between heating the glass and pulling the tint to prevent the adhesive from settling back.
- Use a razor to remove any small pieces of tint that may remain.
- Apply liquid adhesive remover to the window and let it sit for 10-12 minutes.
- Use the razor to scrape off the adhesive, continuously wiping away loose adhesive and remover until the entire window is clean.
- If there is any remaining glue on the window frame, continue applying remover and scraping until it is completely removed.
- Finish the process by using a vehicle window cleaner and rubbing it with paper towels to wash off any residue.
5. Steamer
This method uses steam to soften the adhesive of the window tint, making it easier to peel off. It is a safe and effective way to remove window tint, and it is less messy than using a heat gun.
Step-by-step guide:
- Fill the steamer with water and allow it to warm up until it starts producing steam.
- Direct the steamer’s attachment about one inch away from the corner of the window. Keep the steamer aimed at the corner for approximately one minute or until you sense the tint loosening.
- With one hand holding the tint, gently pull it down while continuously aiming the steamer with your other hand.
- After removing all the tints, clean the glass using a clean cloth. Apply adhesive remover to the entire glass surface, let it sit for a few minutes, and wipe off the adhesive residue with paper towels.
Conclusion: How to Remove Window Tint
Removing window tint from your car can be done using various methods, such as soap and scrape, ammonia with trash bags and sunlight, a hair dryer, a heat gun, or a steamer. Each method requires specific tools and techniques. Remember to be patient, cautious, and follow the step-by-step guides provided. Prioritize safety by wearing protective gear and disposing of old tint and adhesive responsibly. With the right approach and tools, you can achieve professional results and give your vehicle a fresh look.

