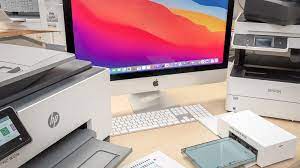
The Mac, especially for a new user can be quite complex to navigate. MacOS is different in many ways compared to other laptop PCs that use Windows OS or Linux. If you have been an active user of either of the aforementioned OS and then switched to Mac, you might find it quite hard to navigate some things.
This is because, the functions, the shortcut, the interface, and the operation process are distinct in some ways. On a normal Windows laptop, you could right-click on the file, and click on the print option. Then set your printer and paper mode, here on Mac, it’s quite different, slightly. Another issue with the latest Mac is the wired connectivity mode.
Most Macs do come with the Type-C port whose connection mode might depend on the printer. However, Let’s see the step-by-step guild to get your printer connected and print on Mac computers.
1. Printer Setup and Connection
Make sure your Mac and printer are correctly connected. Make sure it’s linked to the same Wi-Fi network as your Mac if it’s a wireless printer. Thee USB connection have to be firmly attached to both the printer and your Mac when using a USB printer. Install any essential printer drivers or software from the manufacturer’s website, if necessary.
You may get a USB-C to USB-A converter or cable to fix the problem when your MacBook has USB-C ports but your printer utilizes a USB-A connection. You may use these adapters to connect the USB-A cord from your printer to the USB-C port on your MacBook. Make sure that the cable or adapter works with both your MacBook and the printer.
2. Open the Document to be printed
Use the program that is most suited to the format of the specific document, picture, or file you wish to print. Applications like Pages or Microsoft Word are appropriate for documents with text content. The Preview app gives you fine-grained control over picture resizing, formatting, and quality when working with photos or PDFs.
In addition, some file formats may require specialist software, such as CAD applications for technical drawings or graphics editing tools for sophisticated designs. Making sure you’re using the right program ensures the best print quality and formatting.

3. Access Print Dialog
Navigate to the “File” menu in the top-left area of your Mac’s display. The name of the application serves as a representation of this menu, which is normally featured in most apps. Locate and choose the “Print” option from the dropdown menu that displays when you click the “File” menu. This will start the printing process and bring up the print dialog box, where you may set up different print preferences.
Alternatively, you may use the keyboard shortcut Command + P to open the print box more quickly. On your keyboard, just hold down the “Command” key (sometimes known as the “Cmd” key) while pressing the “P” key. This keyboard shortcut acts as a straight command to begin printing, conveniently bringing up the print dialog box right away. When working on typical chores on your Mac, using keyboard shortcuts may speed up your productivity and save you time.
4. Setup Your Printing Options
After choosing your preferred printer from the “Printer” dropdown option in the print dialog box, go to the “Show Details” section. You may customize your printing experience by selecting this option to have access to a variety of sophisticated print options. To get a desirable result aside from the normal ones, here, you may modify the output to precisely reflect your choices and needs:
Selection of Paper Size: You may change the paper size to suit your needs. There are options like letter, A4, legal, and more to accommodate various document sizes.
Optional Orientations: Choose whether to print your document in portrait or landscape orientation. This is especially helpful if you’re printing material or photos with certain formatting requirements.
Customizing the layout: By choosing choices like two-sided printing, numerous pages per sheet, and even booklet format, you may change the arrangement of your output.
Levels of Print Quality: Adjust the print quality to your preferences. Select from choices like top quality, regular, and draft. Remember that slower printing speeds may occur from using higher quality settings.
Favorite Colors: Your printout’s color settings should be adjusted. Depending on the content of your document and the results you want, decide between printing in color or grayscale.
5. Print
Click the “Print” button to continue after fine-tuning the print parameters to suit your needs. This straightforward procedure causes your Mac to send the print job to the designated printer. You can see a print progress pane appear on your screen throughout this procedure. This pane keeps you updated on the progress of the procedure and offers helpful insights into the print job’s status.
Your document will be available for retrieval after the printing procedure has been completed. The printout could be automatically ejected into the printer’s output tray depending on the printer’s settings and capabilities. To prevent any potential smearing or errors, always make sure to wait until the printing process is finished before downloading your document.
Take Note
The methods listed here are a rough outline, and depending on the program you’re using and the printer model you have, there may be some differences. Knowing how to print on your particular devices can provide a simple and hassle-free experience.
It’s essential to make sure the printer is connected and powered properly when printing from a Mac computer. In the print dialog, choose the appropriate printer and check parameters like paper size and color.
To preserve quality, check and change ink or toner frequently. Also, be conscious of your paper use by limiting the number of copies. To ensure compatibility with macOS upgrades, update printer drivers and firmware. Last but not least, let printed sheets dry completely before handling them to avoid smudging or damage.
FAQs
To print a document on a Mac computer, open the document, go to the “File” menu, select “Print,” configure the print settings, and click the “Print” button.
If your printer isn’t listed, ensure it’s properly connected to your Mac and powered on. You might need to install printer drivers if they’re not automatically detected.
If your print job is stuck, check the printer’s status and make sure it’s online. You can also try restarting both the printer and your Mac.
In the print dialog, look for the “Two-Sided” or “Duplex” option and choose whether you want to print on both sides of the paper automatically or manually

