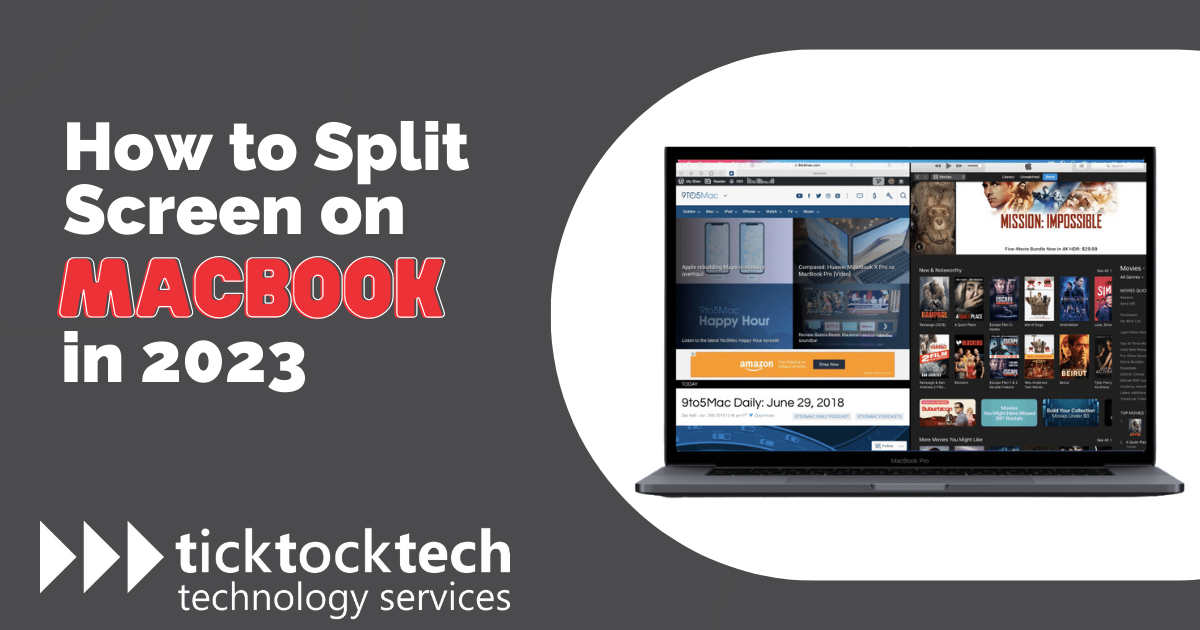
Possessing proficient computer skills improves task completion and enhances productivity. One valuable skill to acquire is the ability to access split-screen mode, called Split View, on a MacBook laptop. This feature allows users to display two windows side by side in full-screen mode, facilitating seamless multitasking and simultaneous usage of multiple applications.
In this article, we will explain how to use the split screen effectively and provide tips on arranging your screens for maximum productivity on your MacBook. In addition, we will explain the process of exiting the mode and offer troubleshooting advice for common issues that might occur.
Related: How to Screenshot on MacBook
Split Screen or Split View functionality on MacBook
The split screen functionality on MacBook allows you to divide your screen into two or more windows to work on multiple files or applications simultaneously. This feature is particularly useful for multitasking and increasing productivity by eliminating the need to constantly switch between windows. When using the split screen functionality on MacBook, you can place two applications side by side, each occupying a portion of the screen. This allows you to easily compare information, copy and paste between windows, or reference one window while working on another.
Benefits of the Split Screen functionality on MacBook
Split screen functionality on a MacBook offers many benefits that boost productivity. It enhances productivity by allowing you to work on multiple tasks simultaneously without constantly switching between tasks. This means less time on window management and more time on completing your work efficiently.
The split screen functionality can be applied in coding and debugging, email and project management, and research projects. Instead of minimizing and maximizing windows, you can have everything you need in a divided screen layout.
Additionally, split screen promotes better organization by keeping relevant information in view. You can have multiple documents, webpages, or applications open simultaneously, reducing desktop clutter and ensuring that you can quickly reference and access the information you need.
Furthermore, the split screen functionality on MacBook is invaluable for collaboration. Whether you’re working on a project with a team member or participating in a virtual meeting, you can open a video conference window alongside a document, making it easy to discuss and make changes in real-time.
By taking advantage of this feature, you can optimize your productivity and efficiency. This will streamline your workflow and save you valuable time and effort.
How to enter Split View on a MacBook
- Identify the three colored dots: In the top-left corner of an application window, you will see three colored dots—green, yellow, and red.
- Hover over the green dot: Move your cursor over the green dot or click and hold it. This action will trigger a menu of options.
- Choose left or right: From the options presented in the menu, select either “Tile Window to Left of Screen” or “Tile Window to Right of Screen” based on your desired position for the application window. Alternatively, you can manually drag the window to the desired side of the screen.
- Adjust other windows: Active applications will automatically move to the opposite side of the screen. Click on the application you want to display alongside your initial selection, and it will fill the remaining portion of the screen.
How to exit Split View on a MacBook
- Navigate your cursor to the top of the screen until you see the sizing buttons (red, yellow, and green) at the top left corner of each window.
- Click the red button (close button) to close the window or click the green button (maximize button) to exit split screen.
- If you closed one of the windows, don’t worry. The other window is still open but may be in full-screen mode. To access it again, press the Mission Control button (F3) on the top row of your keyboard.
- Once you activate Mission Control, you will see a view of your open windows at the top of the screen. Locate the other window you had in split screen mode and click on it to bring it back to the forefront.
- If the window you want to access is in full-screen mode, just click on the green sizing button located at the top left corner of the window. This will exit full screen and restore it to a regular window view.
Keyboard shortcut for split screen on Mac
MacBook offers several convenient keyboard shortcuts, one of which allows you to activate split screen mode effortlessly. To begin, press the combination of Control + Command + F to enter full-screen mode. Once in full screen, press the F3 key to bring up Mission Control. Next, you can add another application to your full-screen view by dragging it onto the existing app that is already in full-screen mode. Click on the newly arranged apps, and you will enter Split View, allowing you to work seamlessly with multiple apps side by side.
If you find the above steps too cumbersome, you can customize your own keyboard shortcut. To do this, navigate to System Preferences, select Keyboard, and go to Shortcuts. Then, choose App Shortcuts and click on the “+” button to add a new command. Give it a name like “Tile Window to Left of Screen” and assign your preferred shortcut. Once activated, your active window will automatically tile to the left side of the screen, and you can effortlessly select a second window to join it in the split screen setup.
Related: 8 MacBook Air Alternatives You Should Check
Techniques for Customizing Split Screen on MacBook
The split screen feature comes with additional functionalities that can be adjusted to suit your needs. By utilizing these functionalities, you can easily adjust your split view setup, connect to additional monitors, and seamlessly access other applications on your MacBook. Here are some ways to customize your Split View experience:
Switch sides
If you prefer to change the arrangement of your windows, you can easily switch their positions. By dragging the gray bar at the top of a window to the other side of the screen, you can relocate it. Hover your cursor near the top of the window to reveal the menu bar if it’s hidden. Click and hold the top bar, then move the window to the opposite side. The other window will automatically adjust accordingly.
Connect to a monitor
If you have an additional monitor or screen available, you can easily connect your MacBook to extend your workspace. Begin by checking your computer’s specifications to determine the number of displays it can support and ensure you have the appropriate connector, such as USB-C or USB-4. Once you’ve made the necessary connections, activate the monitor and ensure it mirrors your MacBook’s screen. Next, launch the desired program on your laptop and drag its gray menu bar to the far right or left of your screen, thereby moving it to the connected monitor. Finally, to make the most of the extended screen space, click the green dot in the gray menu bar of each program to enable full-screen mode.
Resize a window
To adjust the size of a window in Split View, you can use the black border between the screens. Simply click and drag the border to the left or right, resizing the windows to your desired proportions. This allows you to prioritize one side of the split-screen view over the other.
Open other applications
If you find yourself in Split View and need to open a new application without exiting the mode, there are several ways to access Mission Control. You can press the “F3” key on your keyboard, swipe three fingers upward on the trackpad, or press “Control” and the “Up” arrow simultaneously. Once in Mission Control, you can view all your open applications and choose the one you want to use. This allows for seamless multitasking, as you can easily switch between applications without disrupting your Split View setup.
How to troubleshoot Split View issues on Mac
If you encounter any difficulties while using Split View on your MacBook, here are some troubleshooting tips to resolve the issues:
- Check your display mode: It’s important to note that Split View will only work when activated from the default window view. If you have an application running in full-screen mode, you won’t be able to initiate Split View correctly. Exit full-screen mode and try again.
- Verify your preferences: Access “System Preferences” and navigate to the “Mission Control” section. Ensure that you have enabled the option for separate “Spaces” under the “Display” settings. If it’s currently disabled, enable it and attempt to launch Split View once more.
- Review your operating system (OS): Confirm your macOS is 10.11 or later. You can check this by clicking on the Apple icon at the top-left corner of your screen. Select “About this Mac” and verify the OS version mentioned. The “Mission Control” option may not be available in earlier macOS versions.
- Update your OS: If you are running an older version of macOS, update it to the latest version available. To do this, go to the same “About this Mac” window and click on the “Software Update” option. Updating your operating system often resolves compatibility issues and provides access to the latest features.
FAQs on How to Split Screen on MacBook
To split the screen on a Macbook and activate split view, follow these steps:
– Identify the three colored dots (red, yellow, and green) in the top-left corner of an application window.
– Hover over the green dot and select either “Tile Window to Left of Screen” or “Tile Window to Right of Screen” from the menu options. Alternatively, manually drag the window to the desired side of the screen.
– The active applications will automatically move to the opposite side of the screen.
– Click on the application you want to display alongside your initial selection, and it will fill the remaining portion of the screen.
To multitask on split screen, you can:
– Use the two applications side by side. Each application occupies a portion of the screen, allowing you to work on different tasks simultaneously.
– Easily compare information, copy and paste between windows, or reference one window while working on another.
– Switch between applications by clicking on the desired window.
The keyboard shortcut to activate split screen on a Mac is as follows:
– Press the combination of Control + Command + F to enter full-screen mode.
– Once in full screen, press the F3 key to bring up Mission Control.
– Drag another application onto the existing app that is already in full-screen mode.
– Click on the newly arranged apps, and you will enter Split View, allowing you to work with multiple apps side by side.
Conclusion: How to Split Screen on MacBook
Split View is a powerful feature on MacBook that allows users to work simultaneously on two or more files or applications. This feature is useful for coding, project management, research, and collaboration tasks. With the ability to customize split screen setups, connect to external monitors, and resize windows, you can tailor your workspace to suit your needs. By following the provided instructions and troubleshooting tips, you can make the most of this valuable feature and optimize your workflow on your MacBook. Embrace the power of split screen and unlock a new level of efficiency and organization in your daily tasks.