Troubleshooting computer problems can be frustrating, especially when you don’t know the fault comes from. Whether you are a PC builder or an average user, acquiring troubleshooting skills to solve hardware problems is essential. This step-by-step tutorial will explore the different troubleshooting computer hardware techniques and methods. Let’s dive in and equip ourselves with the knowledge and skills to diagnose and repair computers like a pro.
Step 1: Identify the Problem

Before diving into the troubleshooting process, it’s crucial to identify the problem with your computer hardware. This step will save you time and effort by focusing on the specific component causing the issue.
Common Signs of Computer Hardware Problems
You may have seen different posts discussing common signs of computer problems. If you haven’t, check out our comprehensive guide on the topic.
When troubleshooting computer hardware problems, it’s essential to recognize the signs and symptoms that indicate a potential hardware issue. Identifying these signs early will help you diagnose and resolve the problem more effectively. Here are some common signs and symptoms of hardware problems:
- System Crashes and Freezes: Frequent system crashes characterized by sudden and unexpected shutdowns may indicate a problem in the hardware components of your computer.
- Slow Performance: Notable sluggishness in computer performance, including slow response times when launching applications or executing tasks. Also, significant delays during file transfers or data processing operations may be problematic for your computer.
- Overheating Issues: These issues include excessive heat emitted from the computer, particularly from the central processing unit (CPU) or graphics processing unit (GPU).
- Strange Noises: Unusual grinding, buzzing, or clicking sounds from internal computer components. Also, clicking sounds from the hard drive may indicate a failing or damaged storage device.
- Error Messages and Blue Screen of Death (BSOD): Error messages indicating hardware failures, such as “No bootable device found” or “Disk read error.” Occurrences of the Blue Screen of Death (BSOD), where the computer screen turns blue and displays an error message, are often accompanied by a system crash or restart.
- Functionality Issues: These include peripherals and external devices, USB devices, printers, and scanners, not recognized or functioning properly.
Step 2: Basic Checks and Precautions

After identifying the hardware problem, the next step is to perform basic checks and take necessary precautions. This step rules out simple issues and ensures a safe environment for handling hardware components.
- Power and Connections: Ensure all power cables are securely plugged into the computer and the power outlet. Check for any loose connections or damaged cables. Test the power outlet by plugging in another device to verify functionality.
- Restart the Computer: Sometimes, a simple restart can fix temporary glitches or software-related issues. Restart the computer and observe if the hardware problem persists.
- Check for loose Components: If applicable, open the computer case and check for any loose hardware components, such as RAM modules, expansion cards, or cables.
- Clean the Computer: Dust accumulation can lead to overheating and hardware problems. Use compressed air or a soft brush to clean the computer’s internal components, especially fans, heatsinks, and vents. Ensure proper airflow by removing any obstructions around the computer.
- Update Drivers and Software: Outdated or incompatible device drivers can cause hardware malfunctions. Keep your applications up to date to ensure compatibility and stability.
- Run System Diagnostics: Many computers have built-in diagnostic tools to identify hardware issues. Run a system diagnostic test to check for any hardware errors or failures. Refer to your manual or visit the manufacturer’s website for instructions on accessing and using the diagnostic tools.
- Data Backup: Before troubleshooting, it is good practice to back up your important files and data. Create a backup of your important data on a storage device.
Step 3: Troubleshooting Specific Hardware Components
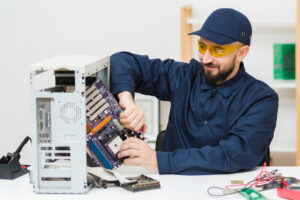
After the basic checks, the next step is to focus on troubleshooting specific hardware components. This step involves more in-depth analysis and targeted solutions for the identified hardware components.
Step-by-step guide for Troubleshooting Memory (RAM)
- Back up all important files and data.
- Analyze the problem and gather information. Check RAM installation, recent changes, and compatibility. Assess any physical movements, system properties, and error messages. Collect information about your computer, memory modules, and motherboard.
- Verify compatibility: Refer to the documentation for the appropriate RAM type. Compare purchased memory module specifications with the required type.
- Check RAM installation: Open the computer case and ensure the power is off and disconnected.
- Clean memory slots and module connectors. Remove memory modules and clean slots with compressed air. Use a soft cloth to clean the module connectors, avoiding solvents or vacuum cleaners.
- Reseat the memory modules: Carefully and firmly reinsert the memory modules into their slots until you hear an audible click.
- Test memory modules individually or in different slots. Swap memory modules between slots or test them individually to identify any faulty components.
- Revert to the original memory configuration. If you recently changed or upgraded memory modules, revert to the previous configuration to check for issues.
- Check for BIOS upgrades: Visit the motherboard or PC manufacturer’s website to check for BIOS updates.
- Scan for viruses: Use up-to-date antivirus software to scan for viruses that can appear like memory errors.
- Remove recently installed hardware or software. Uninstall any hardware or software added before the issue.
- Use memory testing programs: Utilize specialized memory testing software like Gold Memory or Memtest86 to perform thorough RAM tests.
Guide for Troubleshooting a Processor (CPU)
- Monitor CPU temperature: Use the motherboard monitoring program or access the BIOS to check the temperature and fan speed.
- Determine temperature range: Normal temperatures vary depending on the processor, CPU cooler, case, ambient room temperature, and other factors. Temperatures under 35°C are good, 35-40°C are acceptable, and above 40°C may indicate the need for improved cooling.
- Ensure system cleanliness: Blocked air vents tend to increase CPU temperature. Clean your system to maintain proper airflow.
- Use a CPU cooler: CPU coolers reduce temperatures by 5 to 10°C. Ensure the CPU surface is clean, apply an appropriate amount of thermal compound, and securely fasten the heatsink.
- Install additional case fans: If you’ve upgraded the CPU or added a high-performance video card, the case may not handle the increased heat load. Adding more fans or replacing existing ones with higher airflow models can improve interior case temperatures and lower CPU temperatures.
- Assess fan effectiveness: Measure the temperature difference near the power supply fan and case fan outputs using a thermometer. If the difference is 5°C or less, adding or upgrading fans may not significantly improve cooling.
- Consider a thermally advantaged case: Thermally Advantaged Chassis (TAC) cases feature a duct or dedicated fan to exhaust CPU heat outside the case. Using a TAC case can lower CPU temperatures by 5 to 10°C compared to non-TAC cases.
- Position the system properly: The placement of the case can affect the system and CPU temperature. Avoid positioning the case near heat sources, ensure proper airflow, and make adjustments if necessary to optimize cooling.
- Test the CPU in another system: If you suspect a CPU failure, install the problematic CPU in a different system for testing. This will verify if the CPU is actually faulty or if the issue lies elsewhere.
Step-by-step guide for Troubleshooting graphics card and display issues
- Check connections: Ensure that the video cable is securely plugged in between the computer and the graphics card.
- Change card slot: If there are problems with the PCI card slot, try inserting the graphics card into a different slot.
- Monitor check: Replace the monitor to determine if the display problem is related to the monitor itself.
- Test with another card: Swap the graphics card with another one of similar specifications to see if the issue is resolved.
- Verify sound drivers: If your computer crashes during gaming, it may be due to sound hardware issues. Temporarily disable the sound hardware in the Device Manager to verify this. Download and install sound card drivers from the manufacturer’s website if needed.
- Check device status: In the Device Manager, under Display adapters, right-click on the graphics card and select Properties. Check the Device Status for any error codes like Code 43 or Code 12, indicating a problem with the video card.
- Update drivers: Use Windows Update or visit the manufacturer’s website to update the video card drivers.
- Disable and enable the card: Disable the graphics card in the Device Manager, reboot the computer, then enable it again to refresh the driver.
- Uninstall and reinstall drivers: Uninstall graphics card drivers, restart the PC, and let Windows automatically reinstall the drivers.
- Ensure cooling: Clean dust and ensure proper airflow to prevent overheating issues that can cause crashes and display problems.
- Replace the card: If the graphics card is damaged or outdated, consider purchasing a new one with sufficient power for your needs. For integrated graphics cards, replacing the motherboard may be necessary.
Step-by-step guide for Troubleshooting the Motherboard
- Check power supply: Ensure that the power supply is functioning properly. Verify if the power supply fan, CPU fan, and other fans are functioning properly. Also, check the voltages going from the power supply to the motherboard.
- Verify BIOS/UEFI settings: The BIOS (Basic Input/Output System) or UEFI (Unified Extensible Firmware Interface) is a program embedded in the motherboard that starts up the computer. Access the BIOS/UEFI settings and ensure that they are configured correctly.
- Check for overheating: Power down the computer and allow it to cool. Ensure the cooling system is functioning correctly.
- Inspect for distended capacitors: Examine the motherboard for any distended capacitors. If you identify distended capacitors, it is advisable to replace the motherboard.
- Reseat components: Remove and reinstall the CPU, adapters (such as expansion cards), and memory chips. This is to ensure the components are properly seated in their respective slots.
- Remove unnecessary devices: Temporarily disconnect unnecessary adapters or devices connected to the motherboard and attempt to boot the computer.
- Change power outlet and circuit: If possible, plug the computer into a different power outlet and circuit. Electrical problems in the current outlet or circuit could impact motherboard performance.
- Check for grounding issues: Ensure that the motherboard is not coming into contact with the frame or any conductive surface, as it could cause short circuits.
- Check the CMOS battery: The CMOS (Complementary Metal-Oxide-Semiconductor) battery is a small battery located on the motherboard. Locate the CMOS battery on the motherboard and check its condition.
- Utilize diagnostic LEDs (if available): Some motherboards feature diagnostic LEDs that provide error codes or status indicators. Consult the motherboard documentation or online resources to understand the problem and find possible solutions.
Troubleshooting Peripherals (Mouse, keyboard, Webcam, or Printer)
- Test in another computer: Verify if the peripheral works properly when connected to a different computer. This will determine if the issue lies with the peripheral itself or your device.
- Check system settings: If the peripheral works on other computers or was previously functioning correctly, review the relevant settings in your operating system. Ensure the peripheral is identified correctly and configured as desired.
- Download new drivers: Drivers facilitate communication between your peripheral and computer. Visit the manufacturer’s official website to download the latest drivers for your device. Install or reinstall the drivers to ensure proper interaction.
- Unplug other devices: Conflicts can arise between peripherals, causing issues. If you recently added a new device that you suspect to be problematic, disconnect all peripherals from your computer, then reconnect the problematic one. If it functions correctly, there may be a conflict with another peripheral. Reconnect other devices one by one to identify the conflicting component.
- Reinstall the device: Sometimes, reinstalling the peripheral can resolve issues. Unplug the device, uninstall it from your system, and restart your computer. For wired peripherals, unplug and reconnect them. For webcams and printers, properly uninstall them from your system and remove any related software. Restart your computer and reinstall the peripheral.
FAQs on Troubleshooting Computer Hardware Problems
Check power and connections, restart the computer, and clean the computer. Other troubleshooting tips include updating drivers and running data backups.
Identify the specific hardware component. Then use the specialized tools following the appropriate troubleshooting guides.
Conclusion: Troubleshooting Computer Hardware Problems
Troubleshooting computer hardware problems requires a combination of basic checks, a systematic approach, and the utilization of diagnostic tools. By identifying the signs of a particular hardware problem, you can effectively diagnose and fix the issue. It is essential to prioritize safety, perform necessary precautions, and keep records of the troubleshooting process for efficient communication with computer technicians or technical support.