Setting up a wireless network at home is a great way to connect all of your devices to the internet. In this tutorial, TickTockTech will show you how to choose the right router, set up your network, and connect your devices.
What is a home wireless network?

Home wireless networks are a type of local area network (LAN) that allows devices within a household to connect to the internet and communicate with each other. These wireless networks communicate and exchange data using radio waves instead of physical cables.
Pros and Cons of Home Wireless Networks
Home wireless networks have become the predominant choice for most households today, thanks to their convenience and flexibility. However, it is important to understand the pros and cons of wireless networks to make informed decisions during the setup process.
Pros of Home Wireless Networks
- Easy to set up: One of the significant advantages of wireless networks is their easy installation and setup from an end-user perspective. Unlike wired networks that require running cables, wireless networks require little or no stress. This convenience allows users to connect their devices to the network without physically connecting with a router or modem.
- Compatibility: Another advantage of wireless networks is their compatibility with many smart devices. A wireless network guarantees easy access to the internet for online activities such as browsing, streaming, and online gaming.
- Flexibility: The flexibility of wireless networks is a significant advantage that makes them a great option for homes and businesses. Users enjoy more flexibility in terms of device placement and movement within the network coverage area. This flexibility enables users to connect devices from different rooms or areas of the house without the constraint of physical cable lengths.
Cons of Home Wireless Networks
- Security: Wireless networks are more susceptible to security threats than wired networks. Without proper configurations, hackers can access your network and steal your personal information. To tackle this, implement appropriate security measures, such as strong passwords and encryption protocols, to safeguard your network from potential threats.
- Speed: Wireless networks generally offer slower speeds compared to wired networks. This is because wireless signals are more susceptible to interference from other devices and environmental factors. As a result, wireless connections can be slower than wired connections, especially during activities that require high bandwidth, such as large file downloads or video streaming in high definition.
How to setup wireless networks at home
Setting up wireless networks at home involves a few general steps, but there may be slight differences depending on your setup. Here’s a simplified explanation of the process:
Purchase a wireless router
To establish your personal Wi-Fi network, you need a wireless router. However, several factors come into play when determining the most suitable router for your needs.
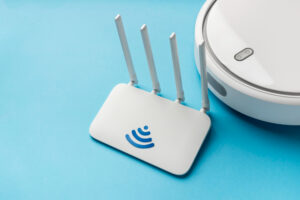
When setting up your wireless network, it’s essential to consider the distance between your router and the devices you want to connect. Higher-priced routers usually come with multiple antennas, which can help maintain a stable connection even when devices are located at a greater distance from the router. So, if you have devices that will be placed far away from the router, investing in a router with multiple antennas can provide a better and more reliable wireless connection.
Signal interference is another factor to keep in mind. Appliances such as microwaves and cordless phones that operate on the 2.4 GHz band can interfere with Wi-Fi signals. Newer routers can operate on the less crowded 5 GHz band, which reduces the likelihood of interference. However, it’s important to note that 5 GHz signals have a shorter range compared to 2.4 GHz signals.
When purchasing a separate router, transfer speed is a feature worth considering. While newer routers claim to have high data transfer speeds, it’s essential to understand that they primarily benefit from data transfer between devices within the network, rather than increasing your general internet speed. It is important to keep your expectations realistic, as achieving the advertised speeds can be challenging in real-world situations due to signal interference.
Also, ensure your router supports the latest wireless encryption standard, WPA2. This encryption standard protects Wi-Fi networks from unauthorized access and keeps your data secure. Most new routers already come with WPA2 encryption, but it’s still a good idea to double-check, especially if you’re considering buying an older or second-hand router. Older encryption methods like WEP are less secure and easier for attackers to bypass.
Related: Difference between a router and a modem?
Connect the router to the modem
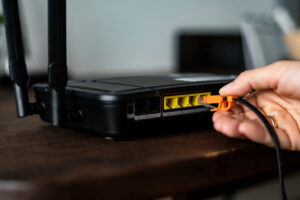
To connect your wireless router to your existing Internet modem, follow these step-by-step instructions:
- Gather the necessary equipment: Get your wireless router, an Ethernet cable (usually included with the router), and the power cable.
- Find your modem and router: Locate your modem, which is the device provided by your internet service provider (ISP) that connects you to the internet, and your wireless router.
- Turn off your modem: Locate the power button on your modem or unplug the power cable to turn it off.
- Connect the modem and router with an Ethernet cable: Take one end of the Ethernet cable and plug it into the Ethernet port on the back of your modem. Look for a port labeled “Internet,” “WAN,” or something similar on the router and connect the other end of the Ethernet cable to that port.
- Power up the modem and router: Plug the power cable into the back of your modem and connect the other end to a power outlet. Wait for a minute or two to allow the modem to fully boot up.
- Power up the router: Connect the power cable to the router and plug it into a power outlet. Wait for the router’s lights to indicate that it’s powered on. This process may take a minute or two.
- Verify the connection: Check the lights on your router to ensure they are functioning correctly. You should see lights indicating power, Wi-Fi, and internet connectivity.
- Wait for the router to establish a connection: Give the router some time to establish a connection with the modem. It usually takes about 30 to 60 seconds for the devices to communicate and synchronize.
- Confirm the router’s operation: The Wi-Fi light should be on, indicating that the wireless network is active.
Configure router
This phase involves accessing your router’s settings page through a web browser on your computer and making changes to the default configurations. By following the guide below, you can configure your router and customize its settings.
- Connect your computer to the router: Ensure your computer is connected to the router through an Ethernet cable or a Wi-Fi connection.
- Access the router’s settings page: Open a web browser like Chrome, Firefox, or Safari on your computer. In the address bar at the top of the browser window, type in the default IP address of your router. This information is usually provided in the router’s manual or on the router itself. Common default IP addresses include 192.168.0.1, 192.168.1.1, or 192.168.2.1. After entering the IP address, press Enter to load the router’s sign-in page.
- Sign in to the router: On the sign-in page, enter the appropriate credentials to access the router’s settings. The default username and password should be provided in the router’s documentation.
- Locate the Network Name (SSID) setting: Once you’re signed in, you will be directed to the router’s settings page. Look for the Network Name or SSID setting. This is where you can enter a unique name for your wireless network.
- Set the Network Password and Encryption: Find the Network Password or Wi-Fi Password setting. Make sure your password is unique and includes a combination of letters, numbers, and special characters.
- Save your settings: Once you have entered the network name and password, locate the Save, Apply, or OK button on the settings page. Click on it to save your changes and apply the new settings to your router.
Connect
Connecting your devices to your Wi-Fi network is the final step in setting up a wireless network at home. After the router setup, you can connect your devices to your Wi-Fi network. Here’s how to connect to your Wi-Fi network:
- Access your device’s network settings: Navigate to the settings menu. Look for options related to network or Wi-Fi settings.
- Search for available Wi-Fi networks: In the network settings, locate the option to search for nearby Wi-Fi networks. Click on this option, and your device will scan for available networks.
- Select your Wi-Fi network: Once the scan is complete, a list of available Wi-Fi networks will appear. Look for your network’s name (SSID) in the list and select it.
- Enter your network password: After selecting your network, you will be prompted to enter the password. Type in the password that you set during the router configuration process. Make sure to enter it correctly, as Wi-Fi passwords are case-sensitive.
- Connect to the network: After entering the password, click on the connect or join button. Your device will establish a connection with the Wi-Fi network using the provided credentials.
Related: Routers and Switches, and Hub and Bridge
Troubleshooting Wireless Networks
When setting up and configuring wireless networks at home, you may encounter problems that can affect your network’s performance. Here are some common problems you might face and steps to troubleshoot them:
Connectivity Issues
- Ensure that the router and modem are powered on and connected properly.
- Check if the Wi-Fi signal is strong enough by moving closer to the router.
- Verify that the device’s Wi-Fi feature is enabled. Restart the router and device to refresh the network connection.
- Check for any wireless interference from nearby electronic devices or walls obstructing the signal.
Slow Internet Speed
- Run a speed test to determine the actual internet speed received.
- Ensure there are no ongoing downloads or streaming activities consuming bandwidth.
- Consider the number of connected devices; too many devices may impact speed.
- Update the router’s firmware to the latest version for performance enhancements.
Unstable Connection
- Relocate the router to a more central location in the house for better connection.
- Adjust the router’s antenna for optimal signal transmission.
- Change the wireless channel on the router to avoid interference from neighboring networks.
- Use Wi-Fi range extenders or mesh network systems to extend coverage.
Forgotten Network Password
- Establish a connection between your computer and router by using an Ethernet cable.
- Reset the router to its factory default settings.
- Set up the network again, including a new password.
Inability to Access Certain Websites or Services
- Verify if the issue is specific to the device or affects all devices on the network.
- Clear the browser cache and cookies.
- Disable any VPN or proxy settings that might be causing conflicts.
- Check if the website or service is experiencing downtime or is blocked by the router’s firewall settings.
If the above troubleshooting methods do not resolve the issues, seek professional help or contact your router’s manufacturer.
FAQs on How to Set up and Configure Wireless Networks at Home
Yes, you can set up Wi-Fi yourself. The process involves purchasing a wireless router, connecting it to your modem, configuring the router’s settings, and connecting your devices to the Wi-Fi network.
To set up your own wireless network at home, you will need a router, a modem, and an Ethernet cable. Additionally, some technical skills are required to connect the devices together.
The main steps involved in configuring wireless networks are:
– Use an Ethernet cable to connect your computer to the router. This will allow you to access the router’s settings page.
– Launch a web browser and enter the router’s IP address in the address bar. The IP address is usually printed on the back of the router.
– Log in to the router’s settings page. The default username and password are always printed on the back of the router.
– Locate the Network Name (SSID) setting and enter a unique name for your wireless network.
– Set the network password and encryption to secure your network.
– Save the settings and apply them to the router.
– Connect your devices to the Wi-Fi network using the network name and password.
Conclusion: Setting Up and Configuring Wireless Networks at Home
Setting and configuring wireless networks at home is a straightforward process. It involves purchasing a wireless router, connecting it to a modem using an Ethernet cable, accessing the router’s settings page, configuring the network name (SSID) and password, and connecting devices to the Wi-Fi network. It is important to consider factors like signal interference and security measures when setting up the network. If you encounter any problem during configuration, follow the troubleshooting methods above or seek professional help.